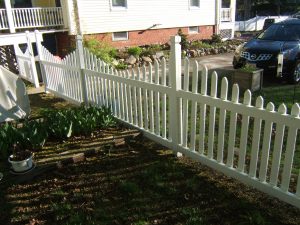
After being battered by many long New England winters, facing near collapse and the constant withering eye of my wife, I couldn’t get away with it any longer. Our little garden fence needed a proper springtime fix–and more than some sandpaper and a coat of paint, I have to admit. The good news is that the fence was made from ordinary 2×4 and 1×3 lumber, so I thought I had a decent chance of fixing it up.
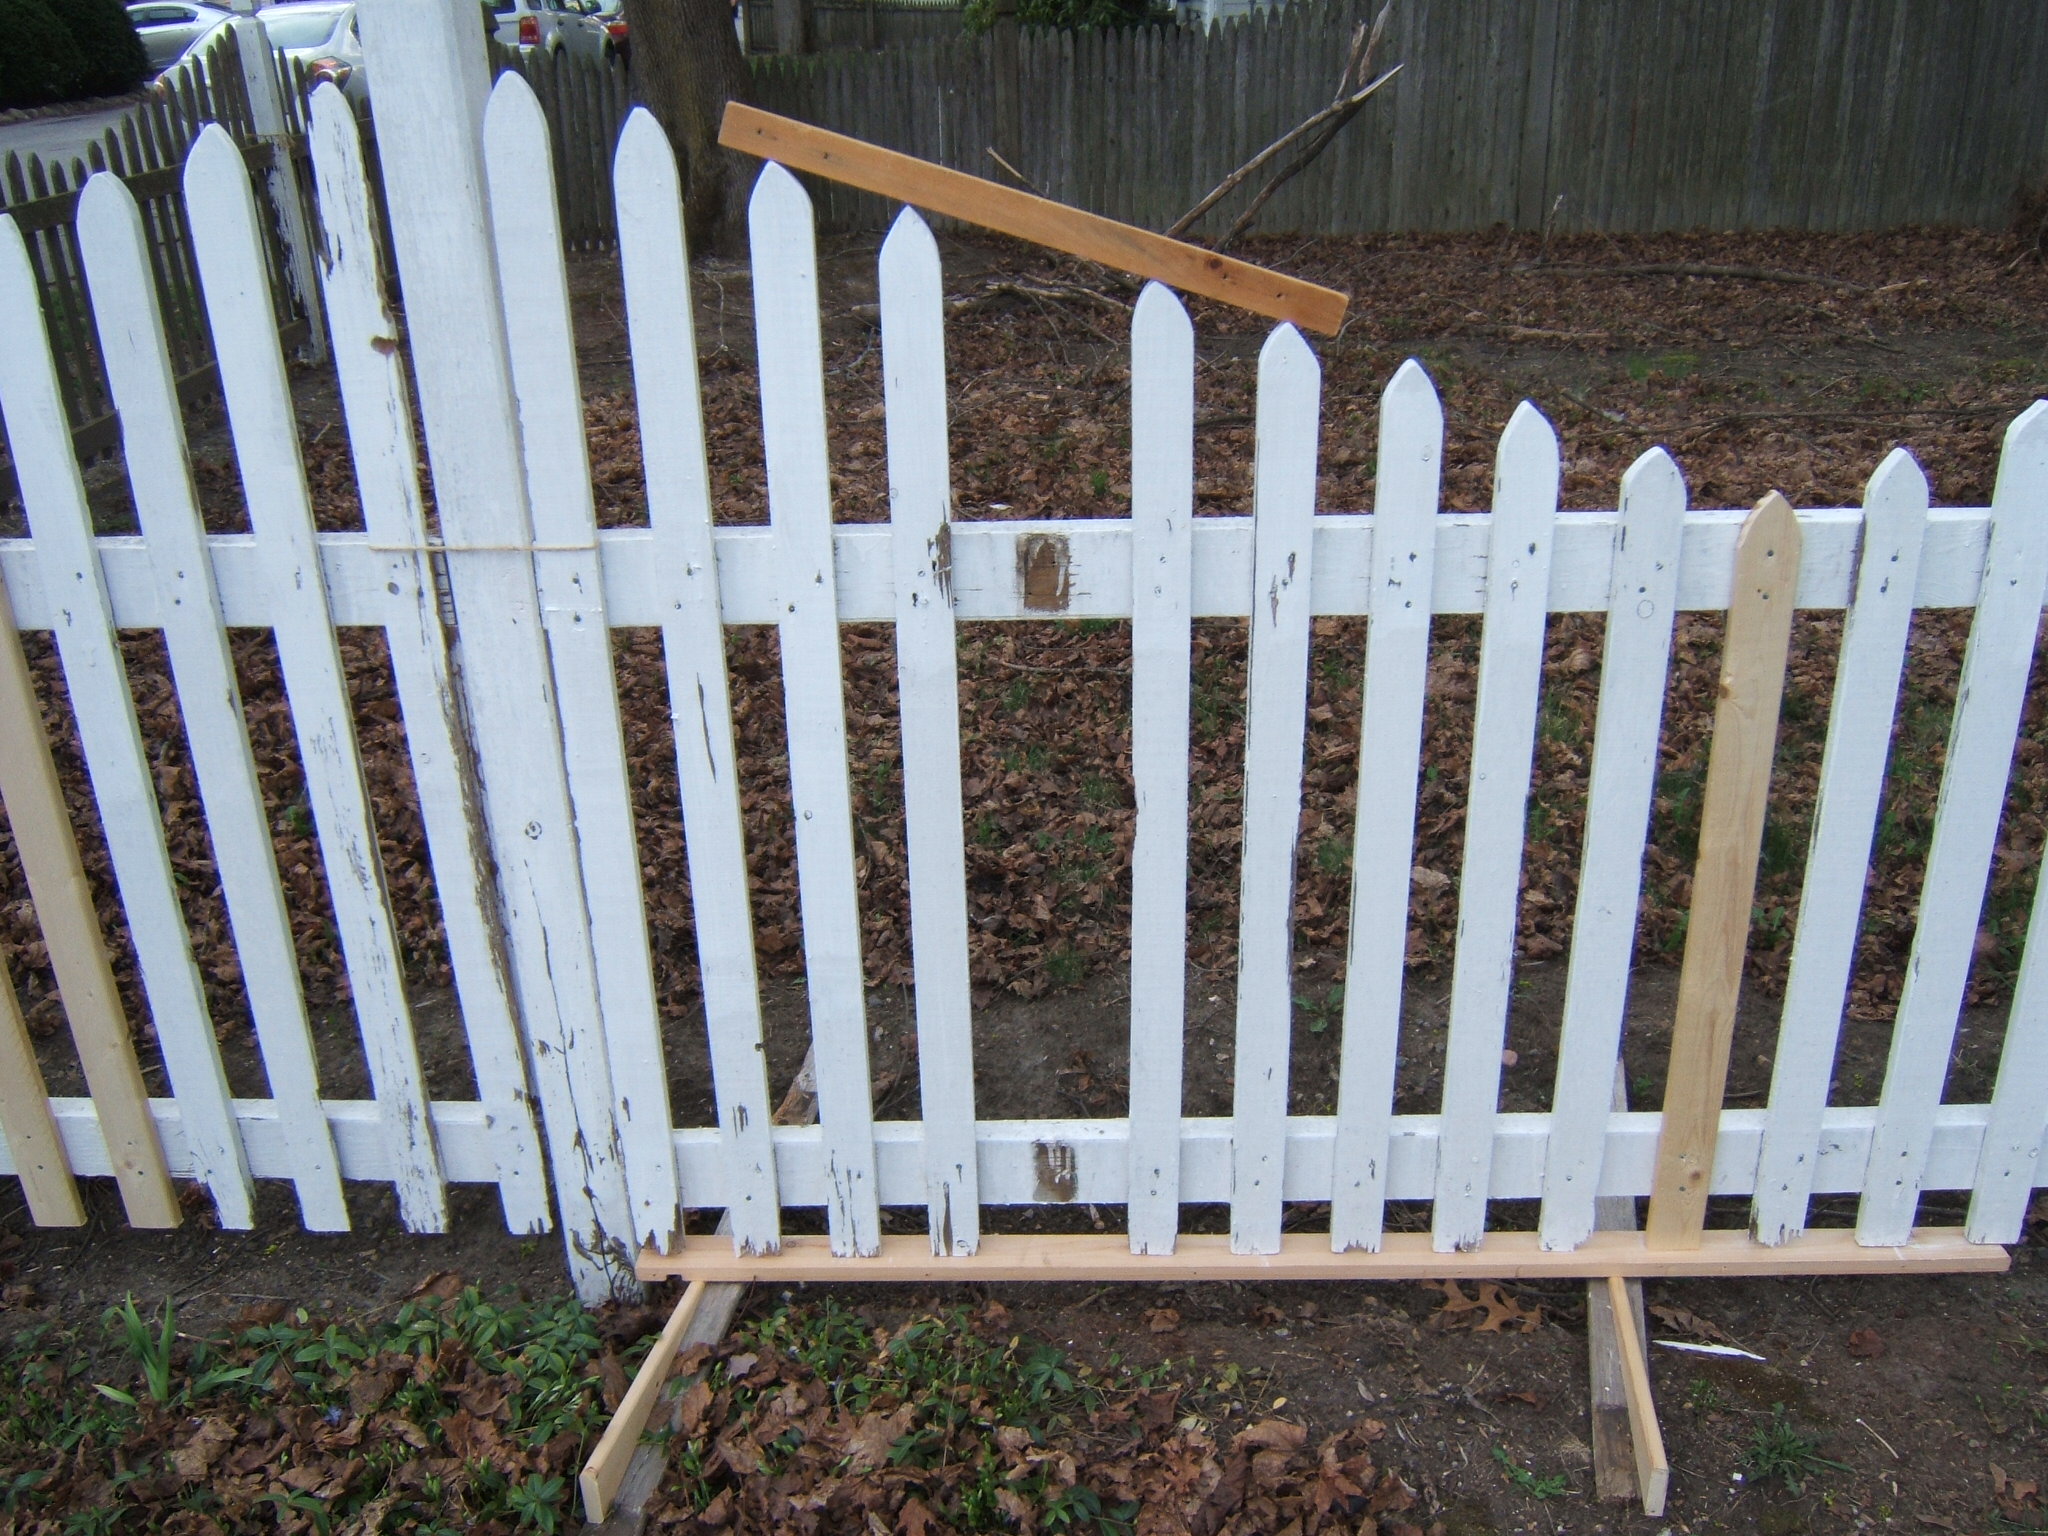
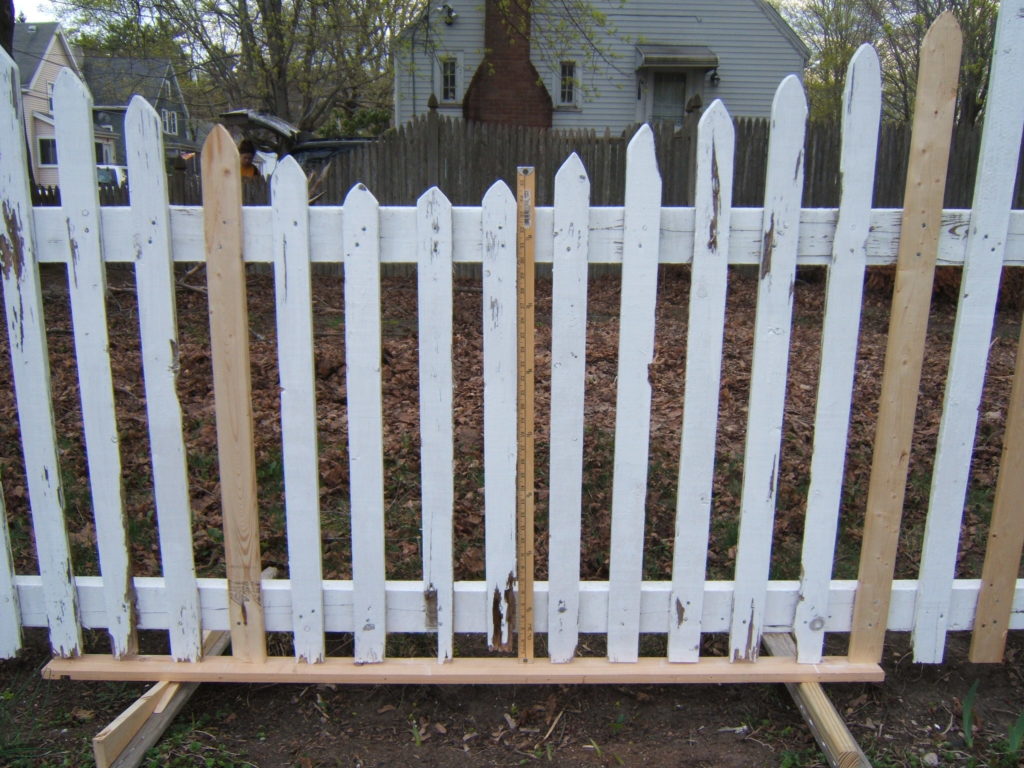
I walked the line and marked off nineteen pickets for demolition. Knocking out the old ones is pretty easy, and fun, but the tough part is making a repair that blends in with the other more seasoned pieces. This means that each picket has to be custom-fitted to the gap that it is replacing, which also means I had to number each one. This bit of administrative planning was a bit of a pain, but it reduced the chances that I grab the wrong replacement and chop it to the wrong length.
My fence is a bit more complicated than most. It has evenly spaced gaps and a concave pattern that repeats itself after every eight-foot section, with pickets arrayed in groups of about twenty-one pickets per section. The middle eleventh picket is the shortest, and the first & last pickets are the tallest. The concave pattern is more like an extra-large herringbone: there is no curve, just a straight line from high-point to low-point to high-point. This is a lot easier to deal with than a truly curved concave pattern, but in the end the technique is basically the same.
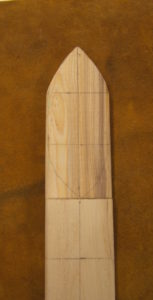
The tops of each picket are finished with a two-inch point. There are several common treatments for pickets, with names like Spear, Cove, and Dog Ear. My fence is tipped with the Gothic-style pickets. I tried to find a decent description of how to make my own, but I got approximately nowhere, and had to design it myself. I looked up and down the fence for the best sample and made a rough pattern out of a scrap piece of wood. At first I thought I could make a kind of stencil, and draw it nineteen times. But I wasn’t able to cut one precisely enough, nor was I able to figure out how to consistently align the stencil against normal variations of stock lumber. So I changed gears and instead tried a compass scribe.
After a bit of experimentation, I figured out the precise arc and focal point that would recreate the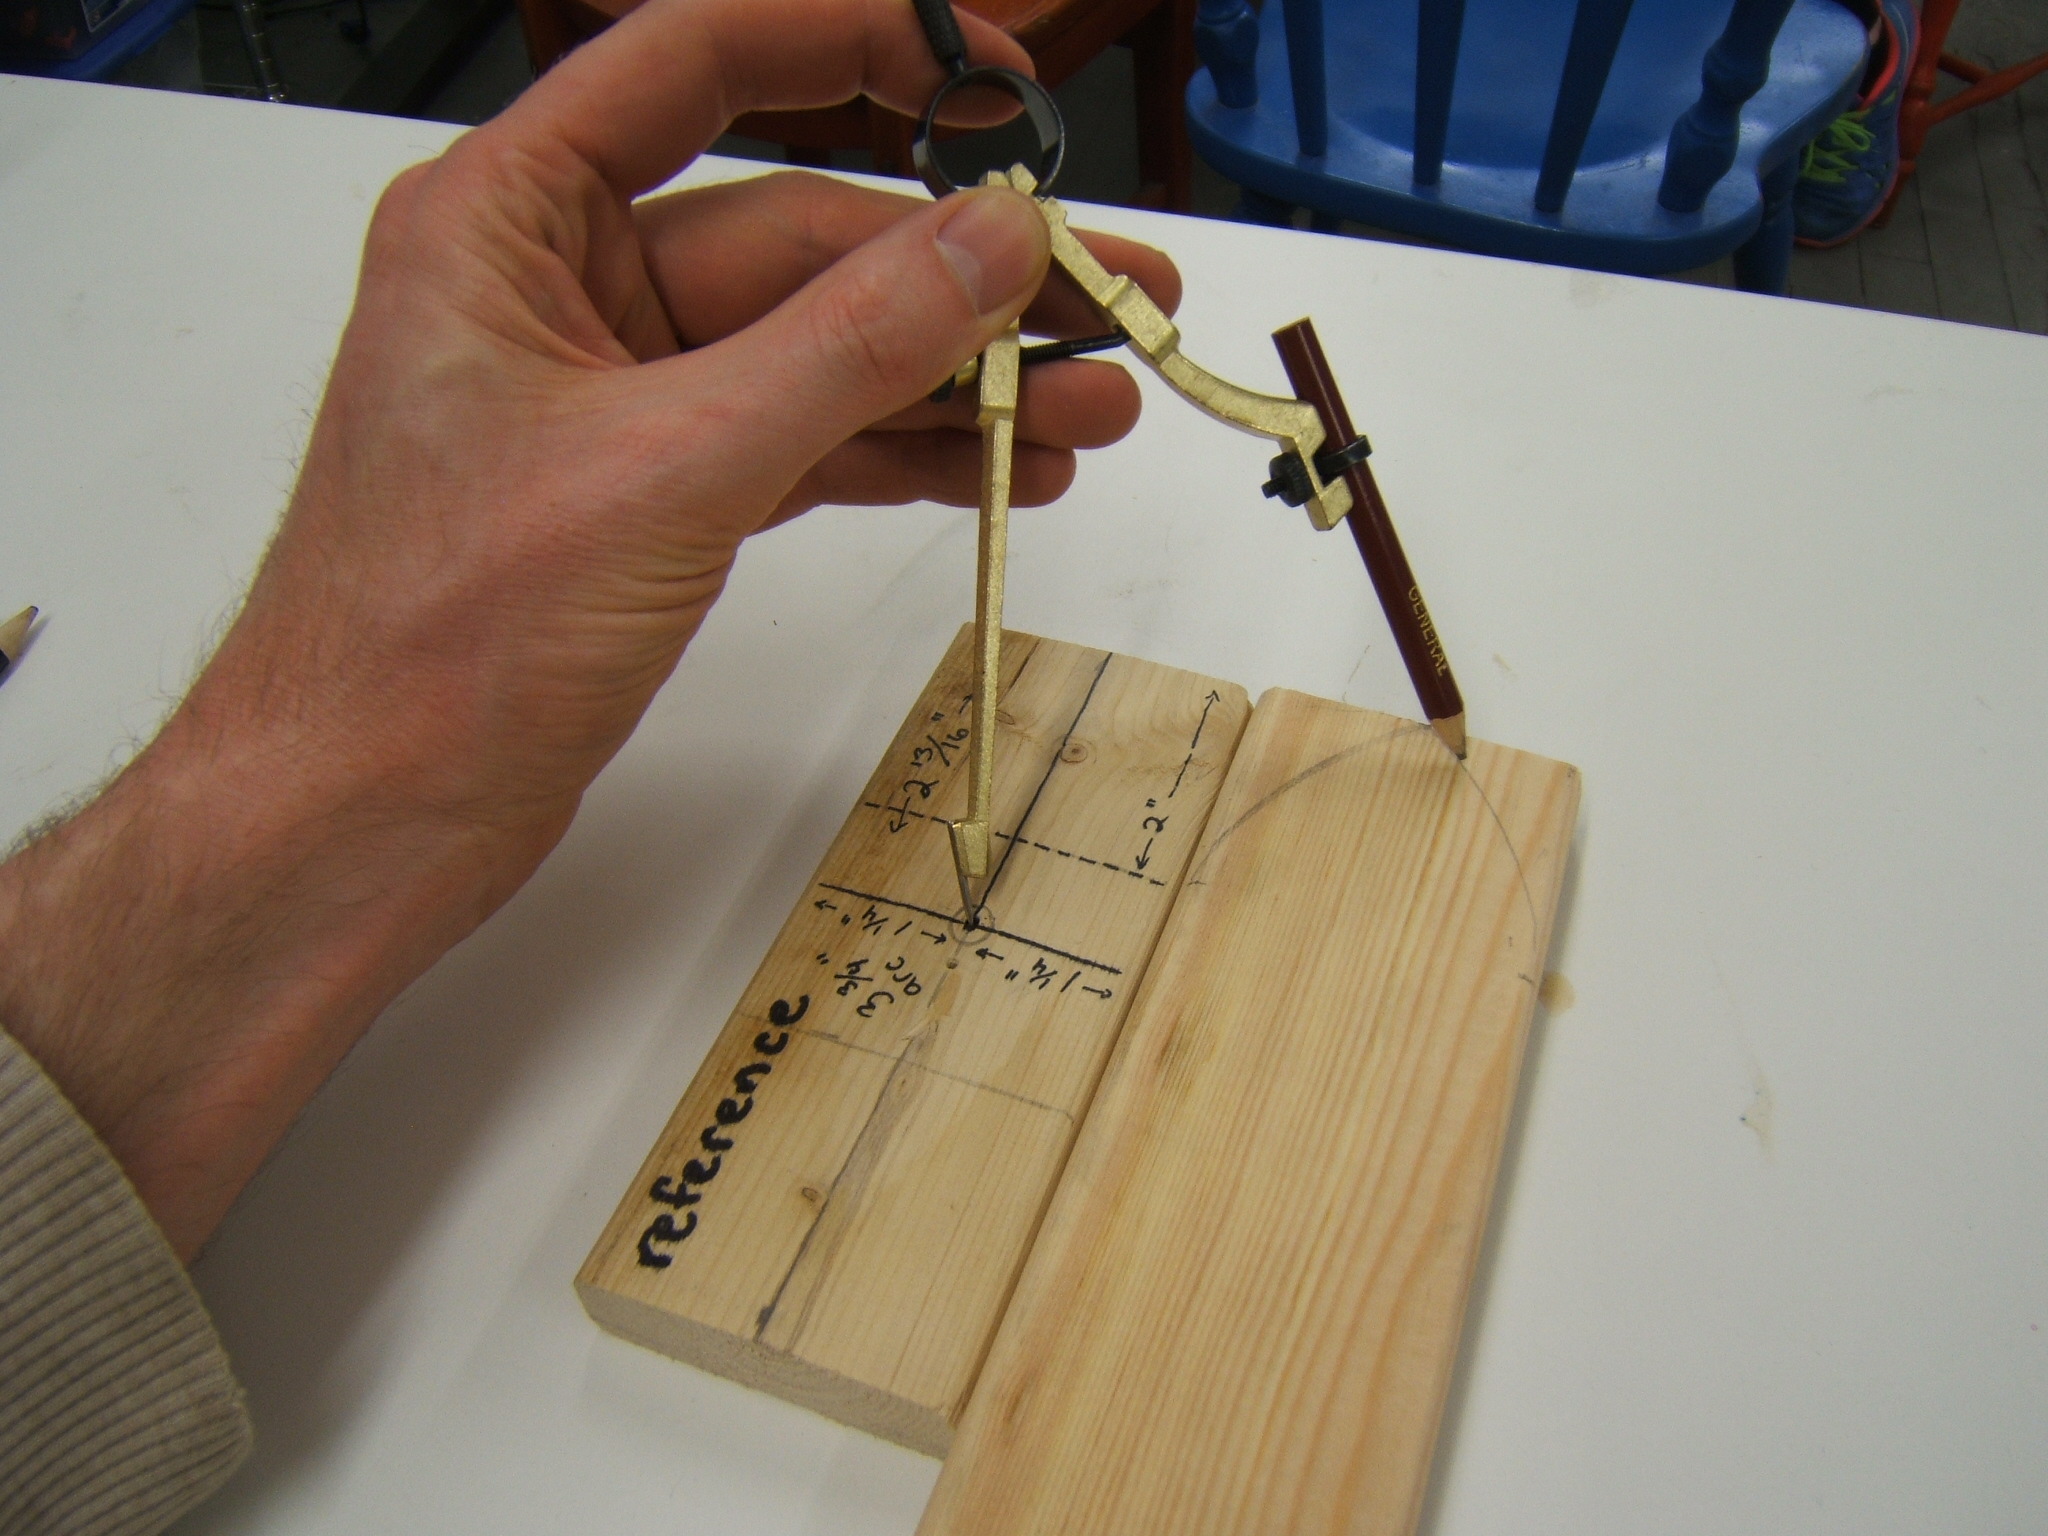 gothic pattern on 1×3 lumber stock. I made a jig out of the same material (actual dimension = 3/4-inches x 2-1/2-inches) that I could slide up next to the wood and draw a consistent and perfectly symmetrical tip. Since the pattern is symmetrical, and the jig is referenced from either edge, it could easily cope with ordinary variations. The radius of the arc is 3-3/4-inches, and the center of the arc is offset 2-13/16-inches lengthwise and 1-1/4-inches widthwise. Unfortunately because the edges are a bit irregular, the arc can get lost as the pencil tip drops off the edge. So I added a two inch limit line, which is a visual cue that helped me cut the arc correctly.
My next task was to rough-cut the lengths of each picket, with about an inch of extra height in case I mangled the curve and had to start over. Then, using the jig, I scribed the gothic pattern into one end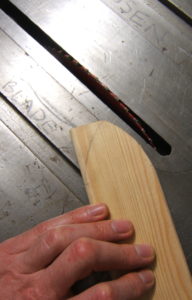 . I took the piece to my saw and made several straight cuts until the tip made the appearance of a nice graceful curve. Once I was satisfied with the tip, I eased the sharp edges with a sharp block plane (sandpaper also works, but takes longer) to make it look like the more weathered ones.
Cutting the final length required a bit more finesse. For most of the pickets, it’s just not possible to get a good measurement of the original, since so much of the old piece has rotted away. The work-around is to establish a baseline by using all the other remaining pickets as a reference. I laid down a small length of straight stock and wedged it underneath the existing pickets, which gave me a decent base from which to take the bottom measurement.
Measuring from edge to edge and cutting the new picket to length usually works well when both ends need just a regular 90-degree “square cut.” It is more difficult to get the length right with all the shaping and easing. As the tip comes to a point, it makes it harder to measure (the hook of a tape measure can easily slip), and very sensitive to even the most minor mishaps. However, if you invert the picket (point side  down) and rest it against the baseline reference stock, you can get a much more stable measurement of length. This also allows you to more easily follow the concave pattern.
Once I figured this out, it was much easier to match the heights of the existing pattern by using a simple straight-edge. Not every picket perfectly follows the visual slope, so there is a bit of fiddling until it looks right. Obviously the line 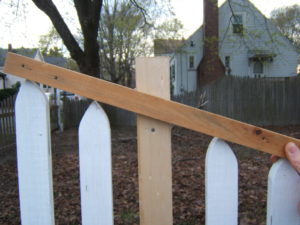 drawn across the stock is at an angle, but the finished cut needs to be converted to a regular cut. I drew a new line square across the picket and made sure they intersected exactly in the middle of the stock. If you’ve got the right moves, you could probably do it freehand, but I find a speed square a necessary tool for laying out square cuts and used the square line to make the cut.
When cutting to length, my advice is to give the picket the slightest boost in length, anticipating future weathering. But so long as it looks good from several paces away, pat yourself on the back for a job well done. Also, make sure to show your spouse how awesome your fence looks.